If you love pretty pressed flower jewelry wholesale , why not try your hand at making some resin jewelry with them? It’s a fun and easy project that anyone can do, and the results are simply stunning. To get started, you’ll need to gather some supplies. You’ll need some clear resin, of course, as well as some pressing tools and molds. You can find all of these things online or at your local craft store. Once you have everything you need, it’s time to get started!
The first step is to press your flowers. This can be done using a simple flower press or by flattening them between two sheets of wax paper. Once they’re flat, it’s time to start adding them to your molds. You can add as many or as few flowers as you like, just be sure to leave enough room for the resin to fill in around them.
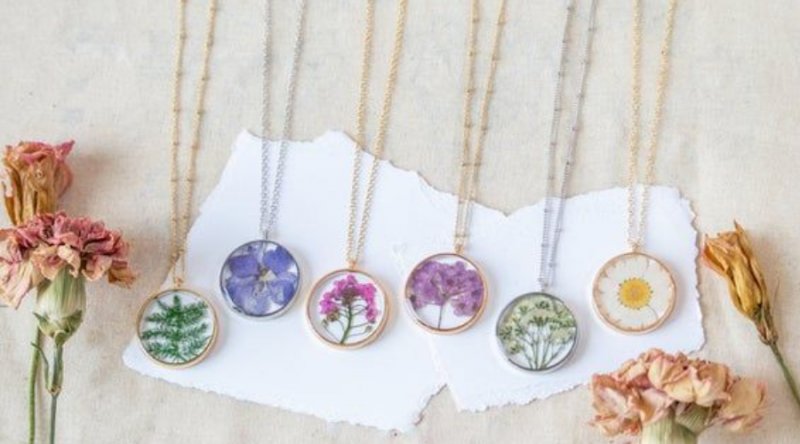
Enjoy the latest flower press collection
Once your flowers are in place, it’s time to mix up your resin. Be sure to follow the instructions on the package carefully, as too much or too little hardener can result in a failed project. Once your resin is mixed, slowly pour it into the mold, being careful not to disturb the flowers. Allow the resin to set overnight before removing it from the mold. Now it’s time to add your finishing touches! You can use a simple paintbrush to add a bit of color to your jewelry, or you can go all out and add glitter or other.
What type of resin do you use to make jewelry?
You’ll want to use clear epoxy resin. Plaid Crafts has Mod Podge Resin, and I find it really easy to use. It has a superior light fastness quality and dries to a hard, clear gloss finish that the leading products do not have. MP Resin is also FDA certified food safe, has low VOCs, and is made in the USA. But it’s up to you! The craft stores have quite a few brands, so be sure to read the packaging to find out what is best for your needs. I don’t like buying it online if it’s not made in the USA, personally.
Mix the Resin
Mix your clear casting resin according to package instructions. Typically it’s a 1:1 ratio of resin to hardener. You’ll use crafting sticks to be sure and scrape the sides and mix thoroughly.
Pour Into Molds
Fill the pendant mold(s) of your choice with the resin, approximately halfway up the side. Let it sit for one hour and use your torch or lighter to remove any bubbles. Tip: you can also exhale lightly on surface to remove bubbles as well.
Add the Flowers and More Resin
Press the flowers of your choice into the resin. It might help to use tweezers, as the flowers are delicate and you want to place them carefully. Pour the remaining resin over the flower and fill up the mold. Remove any bubbles. Wait five minutes and check for bubbles again (and remove!). Let your piece dry for 24 hours and then remove from the mold.
Add the Findings
Use your jewelry pliers to add the jump ring and necklace chain to your necklace pendant. Your project is complete.